Last Updated on: March 9th, 2019
Content upgrades. Lead magnets.
You’ve heard the terminology, but what do these things mean?
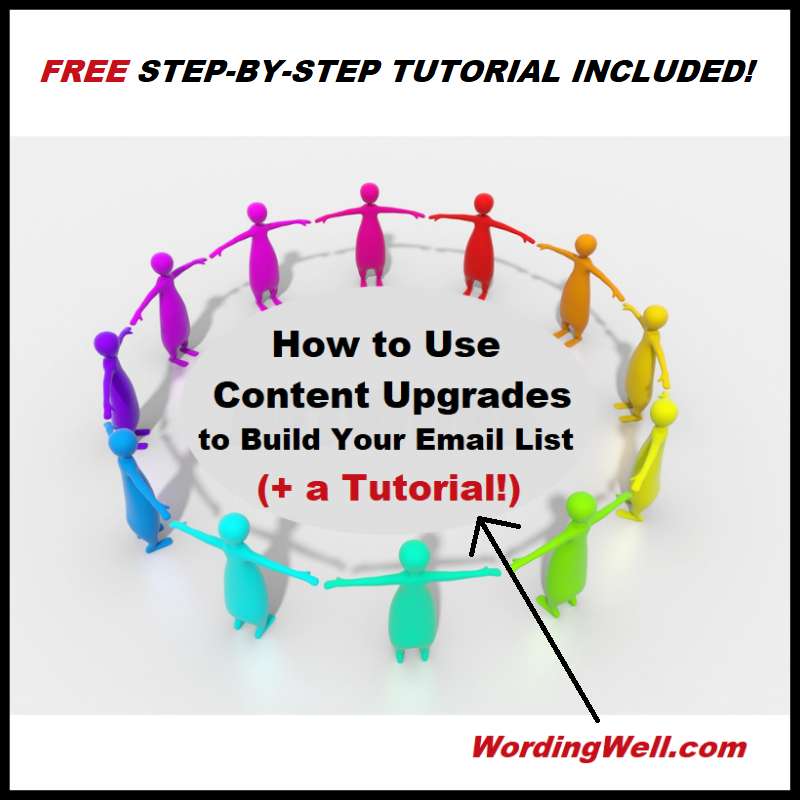
Today, I am going to share with you everything you need to know about content upgrades… including what they are (with samples), who uses them, where to put them, how to create them, and which plugins you can use for them.
I’m also going to give you a step-by-step tutorial on how to use Content Upgrades Pro on your website!
I’m an affiliate for this product and so all links to this plugin in this post are affiliate links. This means I will receive a small commission if you decide to buy this product. I USE THIS PRODUCT on Wording Well, and I LOVE IT!
Article Contents
The contents of this blog post include:
What is a CONTENT UPGRADE?
Samples of Content Upgrades
Who Uses Content Upgrades?
Where Should You Put Them?
How to Create a Content Upgrade (+ Some Tools to Use)
Which Plugins are the Best to Use for Content Upgrades?
How to Use Content Upgrades Pro on Your Site
What is a CONTENT UPGRADE?
Content upgrades are used in blog posts to help grow your email list. A content upgrade is also called a lead magnet (in the marketing world) and is simply some type of bonus content that you give to your readers (or site visitors) in exchange for their email address.
“What is an evergreen lead magnet?”
An evergreen lead magnet is a content upgrade is highly effective because it offers immediate value, can be used again and again, and will always be useful because it can be updated to ensure it’s the best and most up-to-date resource it can be.
Evergreen content upgrades are really good to create because they allow you to use them in multiple posts. This solves the problem of not having to always create a new upgrade for each post!
Instead, all you have to do is copy and paste your “offer” into your new blog post! Easy!
Samples of Content Upgrades
A checklist
A printable (which can be ANYTHING ranging from a checklist to a blog planner to a goals planner to a calendar, etc.)
Access to a recorded webinar or private video
Access to a private file or resource vault
An infographic (Read: The Ultimate Guide to Infographics (Includes 10 Tools + 5 Tutorials!))
A list of tools or resources related to your blog post topic
A recording of written content
A fill-in-the-blank sheet
A PDF of your article
A worksheet
Bonus content not included in the original article
Plus… other things I’ve not listed here! (I’m sure you can think of SOME KIND OF BONUS to give away!)
Who Uses Content Upgrades?
You can see content upgrades in action all over the place. Many bloggers use them to build their email lists!

I have created several content upgrades, too.
Have you seen my Resource Kit page? It says:
Be sure to grab your freebie from How to Find a Good Work-Life Balance (+ a FREE Workbook/Planner).
Also, grab a list of 17 additional self-editing tips from 5 Self-Editing Hacks to Boost Your Blog Writing (+ a FREE Checklist!)
And get your FREE checklist for writing, blogging, and formatting your blog post for SEO from How to Develop a Great Writing and Blogging Process.
As you can see, all of these include a helpful, FREE content upgrade! And I purposely designed them all the same for branding purposes!
Where Should You Put Them?
It’s best to place your content upgrades at the beginning of your post, in the middle of your post, and at the end of your post.
Why 3 places?
Studies have proven that people are more likely to actually sign up to receive your content upgrade if they are exposed to it three times. Some marketers actually think 7 times is the best.
Whatever the number *really* is, it’s clear that messages are more effective when they are repeated.
PLEASE PIN ME!

PLEASE PIN ME!
How to Create a Content Upgrade (+ Some Tools to Use)
Tools to create PDF documents (guides, checklists, worksheets, etc.) include Google Docs, Microsoft Word, PowerPoint, OpenOffice, and LibreOffice… because they all have the ability to export regular documents to the PDF format, which you can then upload to your site.
Google Docs is great if you want to turn a basic article into a PDF. However, Google Slides (Google’s version of PowerPoint) is great if you want to be more creative.
Google Docs is particularly good to use because you can simply upload the shareable link instead of the whole file of your content upgrade, which makes it easier on your hosting costs (because of the small file size). You can also use Dropbox to host your files.
Image creation tools you can use include Canva and Stencil.
Chart creation tools you can use include Pikochart and Infogr.am.
With all of these tools, there are both free and paid versions.
You can use Google Drive or Dropbox to host your images, too.
If you want to create audio or video files, you can read the post on Blogging Wizard about lead magnets to learn which tools are the best for creating and hosting such files.
Which Plugins are the Best to Use for Content Upgrades?
Content Upgrades PRO is one of the best plugins I’ve come across to help you grow your blog readership and email list. Others, such as LeadPages, Thrive Leads, and OptinMonster are good too.
I like Content Upgrades PRO the best. That is why I wrote this tutorial on how to use it. It’s what I use for all of my content upgrades. I’m also an affiliate for them and you can become one, too, especially if you use it on your site! A friend of mine, Tim Soulo, who now works for Ahrefs, created this plugin. In case you don’t know Tim, he’s a genius… so is Neil Patel!
Content Upgrades Pro has three different pricing options:
$47 (for use on 1 website)
$77 (for use on up to 5 sites)
or $197 (for use on an unlimited amount of sites, including your clients’ sites!)
Content Upgrades PRO also offers a 60-day, money-back guarantee!
How to Use Content Upgrades Pro on Your Site
First, you have to buy it. Buy Content Upgrades PRO here.
Once you have done that, install and activate the plugin.
Then you need to enter the Activation Key.
To do this, look at the left-hand side of your dashboard and click where it says Content Upgrades.
A screen will pop up asking you for your Activation Key. Paste it into the box provided and hit SAVE.
Now, when you click on Content Upgrades, you will be brought to the SETTINGS page.
Here you will select your email marketing platform. I use MailChimp.
You then have to insert the API key.
For MailChimp users, use these instructions to find your API key:
1: Log into your MailChimp account and click your Profile name to expand the Account Panel, and choose Account.
2: Click the Extras tab, and from the drop-down menu, choose API keys.
3: Copy an existing API key or click the Create A Key button.
You can also opt to select the box to Disable Double Opt-In (which I did).
Here is a screenshot that shows the box for where you enter the API key, as well as the checked box.

Once you have configured this section, hit SAVE.
How to Add a Content Upgrade
1: From your WordPress dashboard, choose Content Upgrade.
2: Click Create a New Content Upgrade (or, in my case, because I have already created some, go to Your Upgrades.)

3: Give it a name.

4: Scroll down the page until you see the spot where it says Configure Your Pop-Up.
Fill in the spaces for your HEADLINE, your SUBHEAD, and your BUTTON TEXT.

5: Choose whether or not you want to display an image. (Note: You can choose to display a default image that Content Upgrades provides OR you can create your own custom image and upload it here.)

6: Choose a theme.

Here is what the theme default looks like:

Here is the Theme 1 preview:

Here is the Theme 2 preview:

Here is the Theme 3 preview:

Here is the Theme 4 preview:

Here is the Theme 5 preview:

Here is the Theme 6 preview:

7: Choose your list to add subscribers to.

8: Upload your PDF file from your computer. To do this, click the button, go to Upload New Files (not Media Library), and once it’s uploaded, make sure the correct file is selected and click the button Use this file as a bonus.


Note: If you have created your content upgrade in Word, choose Save As and then choose a location on your computer to save it to then choose PDF from the drop-down options. If you have created in Google Docs, choose File then Download As then PDF Document (.pdf).

9: Choose the option of sending your new subscribers to direct URL to download file.

10: Scroll up to the top and hit SAVE. This is a very important step!

Now, we will add this content upgrade to your blog post.
11: Go to your blog post where you want to insert your content upgrade.
12: Write some text you want your visitors to see. For example, CLICK TO DOWNLOAD NOW.
13: (1) Highlight the text and then (2) click the plugin icon.

14: Choose the box you want to use from the list provided.
You have a lot of options here!
Fortunately, the preview will allow you to make a good choice!
Here is the Box 1 preview:

Here is the Box 2 preview:

Here is the Box 3 preview:

Here is the Box 4 preview:

Here is the Box with icon 1:
![]()
NOTE that I have changed the color to red. You can customize these to whichever color you want!
Here is the Box with icon 2 with the icon selected:
![]()
Here is the Box with icon 2 with the icon deselected:
![]()
NOTE THAT YOU CAN SELECT OR DESELECT THE ICONS!
Here is the Box with icon 3:
![]()
Here is the Box with icon 4:
![]()
Here is the Box with icon 5:
![]()
Here is the Box with button 1:

Here is the Box with button 1 with text GET IT NOW:

Here is the Box with button 2 with BOTH calls to action customized:

Here is Box with button 3 with BOTH calls to action customized:

Here is the Box with button 4 with BOTH calls to action customized:

Here is the Box with button 5 with BOTH calls to action customized:

Here is the Box with button 6 with BOTH calls to action customized:

Here is the Button 1:

Here is the Button 2:

Here is the Button 3:

Here is the Button 4:

15: Link your fancy box to your upgrade by choosing the correct upgrade from the list and then click Insert shortcode.


You will see the shortcode show up in your post. This is important because you can now copy and paste this code in other sections of your blog post!
Be Sure to Mention Your Upgrade More than Once!
Scroll through your post. Consider adding your offer in a few other places. Depending on the length of your blog post, you might want to mention it at the beginning of your post, in the middle of it, and towards the end.
Remember what I said earlier about including it at least 3 times!
You can choose to have your offer look the same in all places, or you can create a new “look” each time you mention your offer!
If you want it to look the same, simply copy and paste and paste the shortcode where you want your offer to appear. If you want it to look different, then repeat steps 1-6 from the previous section of this blog post!
16: Save Your Post, Preview, and Test Your Upgrade
Once you have things all set up, you will want to save your blog post, then preview it, and test your content upgrade to make sure things are working perfectly.
Save your blog post as a draft.
Click on Preview.
Find the area of your post where your upgrade it, and click on it. Fill out your name and email. You will be brought to your own upgrade if you did everything correctly!

Get Content Upgrades Pro RISK-FREE!
Content Upgrades PRO offers a 60-day, money-back guarantee! That means there is absolutely no risk involved for you if you buy it. How awesome is that?!
Use this guide to help you get set up. I spent DAYS (yes, days!) making sure it is 100% accurate and helpful for you.
I’m the type of person who needs step-by-step instructions because I am not very techie, and I wish I had THIS TUTORIAL when I was getting set up with this wonderful plugin!
I hope you like it as much as I do!
I LOVE IT!
And I am here to help you if you need it!


Thanks for this great tutorial. No stone left unturned! Enjoyed the post and liked all the mention points. I have one question: What are your thoughts about content upgrades on mobile devices?
Phil, website users or visitors are now accessing our “freebies” or content upgrades via mobile devices, so you bring up a good point. As long as they can enter their email address, they will be sent their freebie.
I think you’ve got done a great deal of analysis i actually appreciate what you’ve got done.
And your way of explaining was very good.
Thanku Lorraine.
You’re welcome, Amar. I’m glad you appreciate my efforts!
Hi Lorraine,
There is no section left in the use of content upgrade that you have not covered. One of the best tutorials I ever read. All I have to say is, Good job! I saved it to pocket for references and also shared it across channels.
Moss Clement recently posted…7 Epic Ways to Avoid Writing Blog Content Nobody Will Read
Moss, thanks for sharing.
And you’re right. I covered EVERYTHING in this tutorial!
But that’s because I love it so much!
Thank you for the information, great article. I hope the steps in your article can help me
Paket Pernikahan recently posted…Paket Pernikahan Jogja
Paket, they will definitely help you!
I am glad to gain this remarkable information from you.
I have found here lots of interesting information for my knowledge I need.
All the details you provide to us, it was very helpful and useful.
Thanks for sharing this amazing post.
Mahima, I’m glad you liked it. I hope you decide to use content upgrades in your blog posts!
Great step by step detailed guide. Thanks for sharing the information. Keep doing the good work.
Mayank Agarwal recently posted…How to check which app has access to your location on android
Thank you, Mayank.
Hi, Lorraine!
I think you have done a lot of research I really appreciate what you have done.
One-up the competition with your lead magnet by making it bigger and better Add content upgrades to your blog posts.
Thanks for sharing with us and please keep posting your thought.
MD Fasheer recently posted…How To Choose Keywords
MD, you always have to stay on the top of your game, for sure! Yes, content upgrades need to be used if you are a blogger! Don’t let those visitors get away without giving them something extra for free! They will turn into your loyal tribe and followers in no time if you keep providing them with value!
Hi, Thanks for sharing this wonderful post with us!! Content is the main strategy nowadays for ranking any website. We have to safeguard our content and our website if we want to be really successful in online world.. 🙂
Dev Pandey recently posted…How to make money with Fashion Blog or website?
Dev, it’s no secret that content is king, as the old saying goes!
And by offering content upgrades to your audience, you will gain their trust and turn them into loyal readers and followers quickly!